Get Started
By the end of this article you will have a workspace set up for Allium script development.
This documentation assumes you have a general understanding of:
- Git fundamentals and Github.
- How to download and install Java for the version of Minecraft you want to devlop for, on the operating system you're running.
INFO
To an extent, certain IDEs abstract these assumptions into an understanding of how to use the IDE. For example, IntelliJ IDEA provides an in-IDE means of downloading Java versions, some of which have added functionality that support using hot-reloading while debugging.
Installation
In general, for the least amount of friction while developing, it is recommended to do so in an environment that is also conducive to Java modding. Grabbing class names and understanding what the game is doing are made much easier in an IDE that's set up for a java mod. This guide demonstrates how to get set up via IntelliJ, but VSCode and Eclipse are also viable IDEs.
The Easy Way
- Install IntelliJ IDEA
- Install the MCDev and EmmyLua2 plugins.
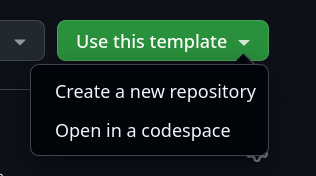
- Head to the Allium Example Script Github repository. Click "Use this template" in the top right, then select "Create a new repository".
Screenshot
- Fill in the repository name, and optional description. Wait for it to redirect you, this will be the repository from which you will be developing from.
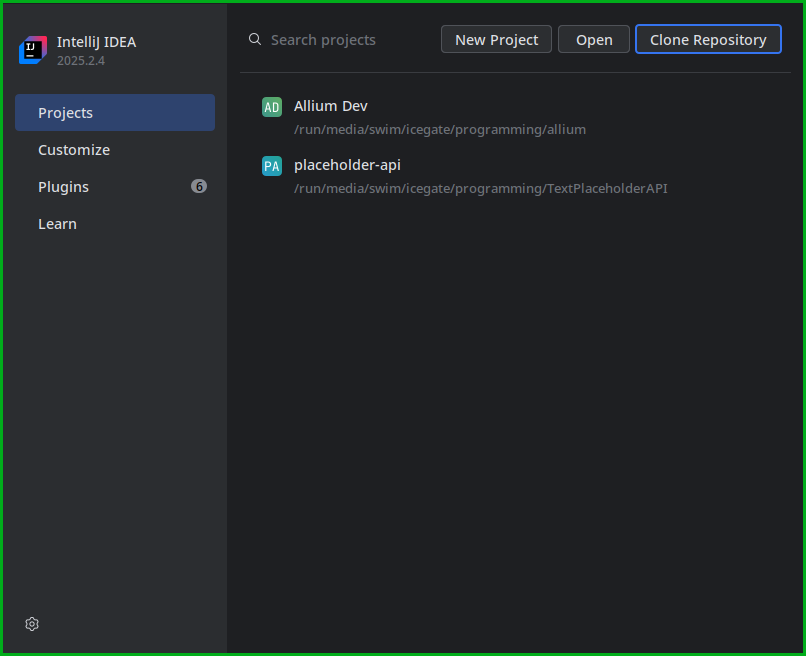
- Back in IntelliJ IDEA, click "Clone Repository".
Screenshot
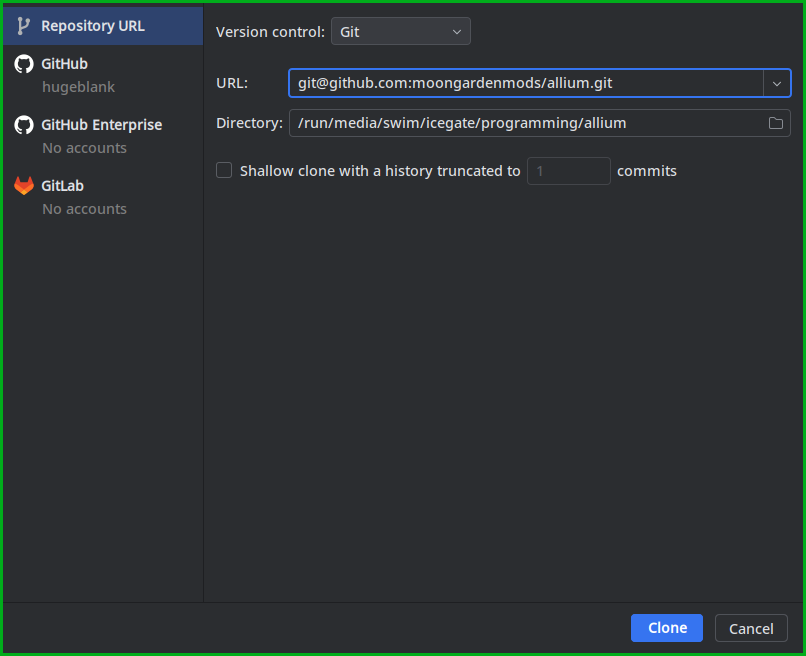
- Clone the repository using the URL in the "Code" button dropdown. Click Clone, and wait for the project to finish importing.
Screenshot
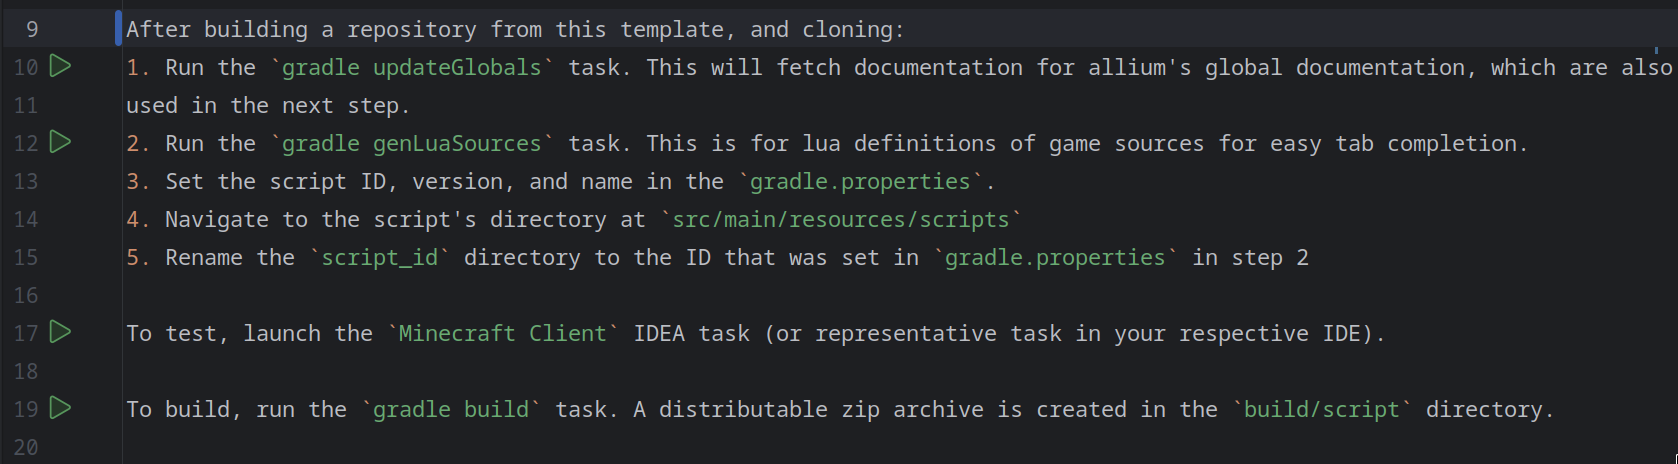
- Follow the listed instructions provided in the README that opened when the project loaded in. If using IDEA, the gradle tasks and run configurations have helpful "Run" buttons next to the line number, for easy setup.
Screenshot
The Not-so-easy Way
The second easiest way to get started is to clone Allium's own repository and work on your project within it. This kind of setup is beneficial when working with the bleeding edge version of Allium, directly from the source.
- Install IntelliJ IDEA
- Install the MCDev and EmmyLua2 plugins.
- Launch and Click "Clone Repository"
Screenshot
- Clone the repository using the URL in the "Code" button dropdown, or copy
[email protected]:moongardenmods/allium.git. Click Clone, and wait for the project to finish importing.
Screenshot
- In the top right there should be several run configurations in the dropdown. Pick either "Bouquet Client" or "Allium Client", and press the "Run" button.
Screenshot
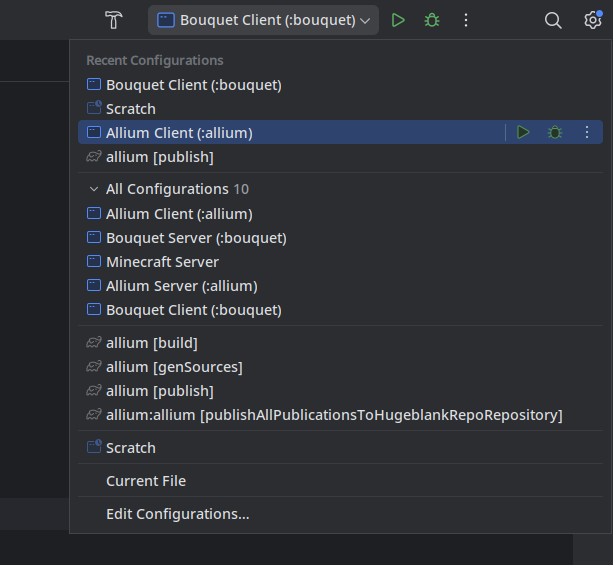
TIP
The "Allium Client" run configuration launches the game without Bouquet. If you intend on using Bouquet as a dependency, consider using the "Bouquet Client" configuration.
TIP
"Server" run configurations are also provided to enable testing that a script works on a dedicated server.
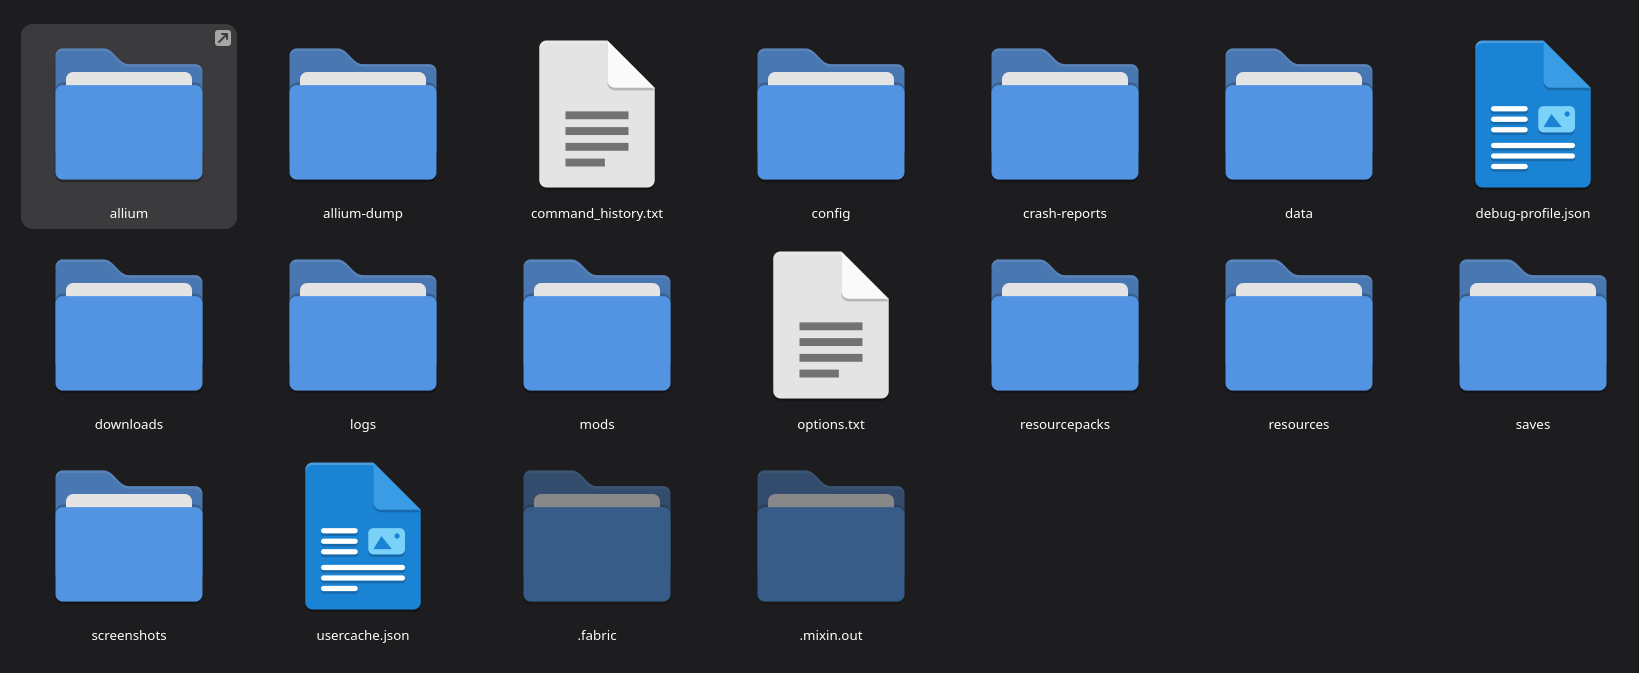
- The prior step creates a folder
runat the root of the project. Within that folder should be the folders one would expect to see in an instance of the game (ex.saves,resourcepacks,mods). Additionally,alliumshould be there, which is where scripts go.
INFO
If you would like to add the example scripts to be run when launching the game, drag and drop the contents of bouquet/examples into the run/allium folder. To prevent confusion, especially if planning on modifying the example scripts, consider symlinking the bouquet/examples directory to run/allium.
The Hard Way
If the only goal is to create a simple script with little to no references to game logic, it might be preferable to skip setting up the IDE and do development in a production instance of the game. Do this using your preferred launcher (Prism, MultiMC, Vanilla, etc.). Download Allium, create the allium directory in the instance root, and optionally install Bouquet.
Screenshot
 An example of the usual game instance with Allium
WARNING
Note that this method is not advised, and is only presented as a possible way of using Allium.
INFO
Should you disregard the above warning, a source-code viewer like mcsrc.dev may prove to be useful.